When you start to use NONMEM, the first thing that you notice is that there is no graphical user interface (GUI) that comes with it. This can be a shock for a millenial who grew up only vaguely remembering the dial-up modem sound and is being used to having ready to go user-friendly software packages.
Of course, there are some GUI’s available nowadays for NONMEM, but sometimes it is good to go back to the basis when you for example want to increase your efficiency. Therefore, in this post I will show how to write a batch file that will:
- Run a NONMEM model
- Create the model diagnostics in R, based on the model output using multiple arguments
In short, a batch file is an executable program that executes commands in turn. In the end, this would result in a quick way to run NONMEM and create the diagnostics in R within seconds, without the use of any GUI.
Background material on batch files and basic functions:
https://www.howtogeek.com/263177/how-to-write-a-batch-script-on-windows/
https://en.wikipedia.org/wiki/Batch_file
Batch file
First we need to define the steps that need to be taken, but be aware that some steps are dependent on the folder structure that you use. In my case, I have a main folder with different model specific sub-folders. Then in each folder, there is the model file (.mod) with the NM dataset. Some modifications are needed when you for example have all your model files and outputs in a single folder.

And within a folder:

Functions in batch file
The batch file will be located in the main folder and the following functions need to be executed:
- Ask the user for input on which model to run
- Open the folder of the model that we want to execute
- Execute the model using your specific PsN or NONMEM function
- Execute an R script with user provided arguments
For starters, a batch file can be created by creating a simple plain .txt document and saving it with the extension .bat. When you double-click this file, the commands will be executed. The file can then still be modified by right-click –> Edit.
Writing the batch file
As a general note, the batch file will use some functions which I will explain below. More detailed information can be found on many other locations:
%~dp0 : Get the current location of the batch file
call : Used to execute a subroutine or execute other batch files
CD : Change directory (somewhat like changing the working directory in R)
pause : Waits for user to press a key before the next command is executed
REM : Remark/Comment to improve the readability of the batch file
set : Used to define the value of a variable
Knowing these functions, we can combine them in the order we need them.
1. Ask the user for input on which model to run
First, we want the user to type the model number. Since I have a fixed folder structure, my models are always named ModelX, where X changes. After the user types in the model number, 2 new variables are being created: mdl and mdlnr.
REM Set the model number

set /p RN="Model number: "

REM Create two variables to be used later

set mdl="Model%RN%.mod"
set mdlnr=Model%RN%

2. Open the folder of the model that we want to execute
We then need to go to the correct directory where the model is located. This is in my case the location of the batch file (the main folder) combined with the model name (mdlnr).
REM set the location of the model folder ; 1 folder up from the current folder
set wdir="%~dp0%mdlnr%"

REM Go to this directory
CD /D %wdir%
3. Execute the model using your specific PsN or NONMEM function
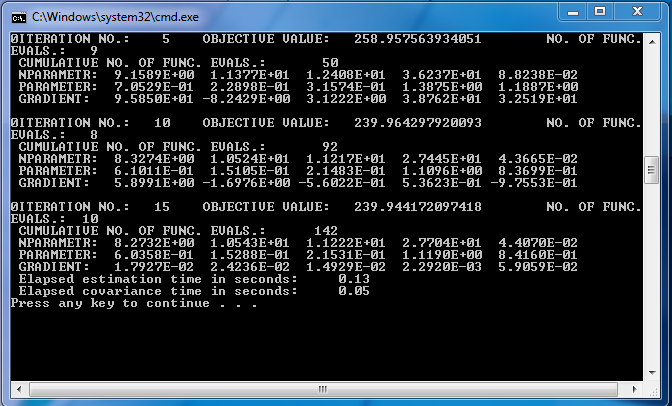
So now we know the name of the model file and we are at the right location, it is then time to execute the model using the PsN or NONMEM command that you prefer and pause afterwards. The user is able to see the minimization and covariance step completion times before the diagnostics are being created. The pause function can always be deleted if the diagnostics should be created right after the model finishes.
REM Run NONMEM with the user specified commands
call execute %mdl%  -clean=3 -tweak_inits -degree=0.6 -retries=5

REM Pause the operation after the model has finished
pause
4. Execute an R script with user provided arguments
When the model is finished, and the user has pressed a key, it is time to create the diagnostics in R. Therefore, we need to set the location of the R script, call this R script and provide some arguments. The arguments that we give to the R script are the working directory and the name of the model we just executed. We end the script by having an ECHO which states: “Diagnostics finished” and a pause afterwards.
REM Process output using r script
REM Set the location of the R-scripts to be executed
set dscript="J:\NONMEM_Diagnostic_Scripts\DiagnosticPlots_V1.R"

REM Call R with the script and 2 arguments (working directory and the model name)
call "P:\R\R-3.4.0\bin\i386\R" --vanilla <%dscript% --args %wdir% "%mdlnr%"

ECHO Diagnostics finished

pause
This can always be extended by adding multiple R scripts which will be executed one at a time.
Full batch file code
REM Set the model number

set /p RN="Model number: "

REM Create two variables to be used later

set mdl="Model%RN%.mod"
set mdlnr=Model%RN%

REM set the location of the model folder ; 1 folder up from the current folder
set wdir="%~dp0%mdlnr%"

REM Go to this directory
CD /D %wdir%

REM Run NONMEM with the user specified commands
call execute %mdl%  -clean=3 -tweak_inits -degree=0.6 -retries=5

REM Pause the operation after the model has finished
pause

REM Process output using r script
REM Set the location of the R-scripts to be executed
set dscript="J:\NONMEM_Diagnostic_Scripts\DiagnosticPlots_V1.R"

REM Call R with the script and 2 arguments (working directory and the model name)
call "C:\R\R-3.4.0\bin\i386\R" --vanilla <%dscript% --args %wdir% "%mdlnr%"

ECHO Diagnostics finished

pause
R-script for automated diagnostics
After the NONMEM execution has finished, an SDTAB will be created (if specified in the $TABLE block of the control stream of course) as output. The common naming I use is SDTABmodelname, e.g. SDTABModel1.
When we want to create our diagnostics, the most troublesome part is to get R to the right working directory and read in the correct SDTAB. Therefore, we need to pass some arguments to R which we actually already have done with:
--args %wdir% "%mdlnr%"
This passes the quoted working directory and the name of the model file (without extension) to R.
Then in R, we use the function commandArgs() which “Provides access to a copy of the command-line arguments supplied when this R session was invoked”. We can then use these objects to set the working directory and read the SDTAB with the xpose function read.nm.tables(). The script can be further extended with the core set of goodness of fit graphs as previously described here.
##################################################################################
############################ CODING BLOCK ########################################
##################################################################################
# Run-Time Environment: R version 3.4.0
# Short title: NONMEM goodness of fit in R executed from batch file
#
# Datafiles used: Model output SDTAB
#
##################################################################################
##################################################################################

library(xpose)

################
# Retrieve arguments passed on by the batch file
# --------------
work_dir <- commandArgs()[4]
model <- commandArgs()[5]

################
# Set the working directory to the model folder
# --------------
setwd(work_dir)

################
# Read data sets
# --------------
Run<-read_nm_tables(paste("SDTAB",model,sep=""))

################
# Continue with GOF graphics
# --------------
Comment
Any suggestions or typo’s? Leave a comment or contact me at info@pmxsolutions.com!